 Knowledge Centre
How to Write a Drainage Strategy for Planning Permission
Last Updated: November 6, 2026
Quick Summary
To write a drainage strategy for planning permission, gather site levels and existing drainage records, then work through the drainage hierarchy and evidence why each option above your chosen discharge destination was ruled out. Structure the document around site description, flood risk, hierarchy appraisal, proposed design, attenuation calculations and a maintenance plan naming who looks after each component.
- A topographical survey of existing ground levels is needed before any drainage design work begins.
- Work down the drainage hierarchy in order and justify every option you skip with evidence.
- Limit runoff to the greenfield runoff rate and apply a climate change allowance to storage calculations.
- Name the responsible party for maintaining every drainage component in the maintenance plan.
- Most LLFA rejections are avoidable, including missing infiltration testing and absent climate change allowance.
Table of Contents
- What a Drainage Strategy Must Cover and When It Is Required
- Step 1: Gather Site Information and Complete a Topographical Survey
- Step 2: Commission a Flood Risk Assessment for Planning Permission
- Step 3: Apply the Drainage Hierarchy and Select Your Discharge Destination
- Step 4: Design Sustainable Drainage Systems for Planning
- Step 5: Use a Drainage Strategy Template to Structure Your Submission
- Section 1: Site Description and Existing Drainage
- Section 2: Development Proposals and Impermeable Areas
- Section 3: Flood Risk Summary
- Section 4: Drainage Hierarchy Appraisal
- Section 5: Proposed Drainage Design
- Section 6: Attenuation Storage and Runoff Rate Calculations
- Section 7: Maintenance and Management Plan
- Section 8: Drawings
- Section 9: Supporting Documents
- Drainage Strategy Example: What a Complete Submission Looks Like
- Common Validation Failures and LLFA Objections, and How to Fix Them
- Frequently Asked Questions
What a Drainage Strategy Must Cover and When It Is Required
A drainage strategy is a written document that sets out how surface water and foul water will be managed on a development site, and it forms part of the evidence base for a planning application. It shows the local planning authority and the Lead Local Flood Authority (LLFA) that your proposal will not increase flood risk on or off site.
When a Drainage Strategy Is Required
Most major developments need one. Many minor developments need one too, especially where surface water cannot drain to a public sewer or where the site sits in a flood zone. A common trigger is a site that currently drains to a combined sewer, because the authority will want to see that runoff has been reduced.
How Detailed Should It Be at Planning Stage?
At outline stage, the strategy proves the principle: where water will go and roughly how much storage is needed. At full application stage, it must show calculations, levels and a maintenance plan. Outline applications can rely on a drainage statement with indicative figures. Full applications cannot.
Step 1: Gather Site Information and Complete a Topographical Survey
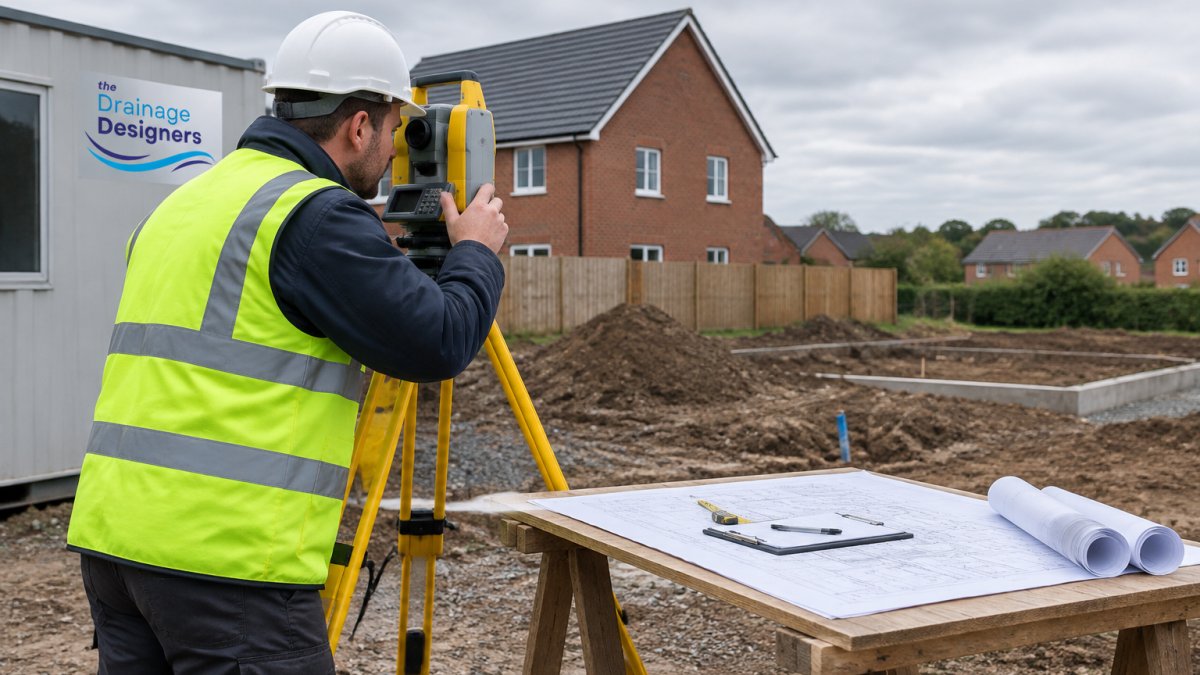
Start with facts about the site, not with a design. A topographical survey records existing ground levels, boundaries, trees and drainage features. Without accurate site levels, your proposed drainage design will not work and the authority will spot it.
The man is British.
Site Location, Existing Drainage and Site Levels
Pull together the following before you draw anything:
- A site location plan with the red line boundary
- Existing drainage records, including any public sewer running through the site
- Ground conditions and permeability from previous investigations
A common mistake is assuming the sewer on site can take more flow. Check capacity early. If a public sewer crosses the site, you may need a build-over agreement, and that affects where attenuation can go.
Step 2: Commission a Flood Risk Assessment for Planning Permission
A flood risk assessment for planning permission is a separate document that identifies every source of flood risk to the site and shows how the development manages it. For sites in flood zones 2 or 3, it is required (Flood risk assessments: applying for planning permission). For sites over a hectare in flood zone 1, it is also normally required (Flood risk assessments: applying for planning permission).
Sources of Flood Risk to Assess
Cover all of these, not just rivers:
- Fluvial flooding from rivers and streams
- Pluvial flooding from surface water runoff
- Groundwater flooding
The government's Flood Map for Planning shows the flood zone for any site, and it is the first thing an authority will check. Our flood risk assessment planning guide explains what a report should contain, and our article on the Flood Map for Planning shows how to read it properly.
Step 3: Apply the Drainage Hierarchy and Select Your Discharge Destination
The drainage hierarchy is the order of preference for where surface water goes. You must work down it in sequence and justify every step you skip. The order is:
- Infiltration to the ground
- Discharge to a watercourse
- Discharge to a surface water sewer
- Discharge to a combined sewer
Infiltration is first because it keeps water out of the sewer network entirely. It only works where ground conditions allow, which is why infiltration testing matters.
How to Evidence the Hierarchy When Preferred Options Are Not Feasible
This is where most submissions fall down. If you rule out infiltration, you need evidence, not opinion. That means infiltration testing results showing poor permeability, or a groundwater source protection zone, or contaminated ground. Write it as a short paragraph per option: what you tested, what you found, and why that rules it out.
Step 4: Design Sustainable Drainage Systems for Planning
Sustainable drainage systems, usually shortened to SuDS, manage surface water by slowing it down and cleaning it before it leaves the site. Typical components include attenuation tanks, permeable paving, swales, rain gardens and detention basins.
Attenuation, Runoff Rates and Climate Change Allowance
Your design must limit runoff rates to the greenfield runoff rate for the site, or to a rate agreed with the LLFA. Runoff volumes above that rate go into storage, and the storage must hold the critical rainfall event with a climate change allowance added. If you need help with the design itself, our SuDS design services guide sets out what a full design involves.
Step 5: Use a Drainage Strategy Template to Structure Your Submission
A drainage strategy template saves time and prevents gaps. The one below follows the order that authorities expect, and each section includes notes on what to include and what evidence to attach. You can copy this structure directly into your document.
Section 1: Site Description and Existing Drainage
What to include: A brief description of the site, its current use, and any existing drainage features.
Evidence to attach: Site location plan, topographical survey, and any available sewer records (from the local water company).
Common weakness: Missing sewer records. Always request these early, as they can take time to arrive.
Section 2: Development Proposals and Impermeable Areas
What to include: A summary of the proposed development, with a plan showing the impermeable areas (roofs, paving, etc.) and their sizes.
Evidence to attach: Proposed site layout plan with impermeable areas highlighted, and a schedule of areas.
Common weakness: Failing to account for all impermeable surfaces, such as driveways or patios.
Section 3: Flood Risk Summary
What to include: A summary of the flood risk assessment, identifying all sources of flood risk to the site and how the development manages them.
Evidence to attach: The flood risk assessment (or a summary if it is a separate document), and the Environment Agency Flood Map for Planning extract.
Common weakness: Only considering fluvial flooding and ignoring pluvial, groundwater, or sewer flooding.
Section 4: Drainage Hierarchy Appraisal
What to include: A systematic appraisal of the drainage hierarchy options, in order of preference. For each option, state whether it is feasible and why.
Common weakness: No infiltration evidence. Authorities will not accept a vague statement that infiltration is not feasible without test results or a clear technical reason.
Section 5: Proposed Drainage Design
What to include: A description of the proposed drainage system, including the discharge destination, pipe sizes, gradients, and attenuation storage.
Evidence to attach: Detailed drainage layout drawings, hydraulic calculation sheets, and a climate change allowance statement.
Common weakness: Missing levels or calculations. Ensure invert levels are checked against the topographical survey.
Section 6: Attenuation Storage and Runoff Rate Calculations
What to include: Calculations for the attenuation storage volume and the limited runoff rate. State the greenfield runoff rate (or agreed rate) and the rainfall event used.
Evidence to attach: Calculation sheets, and a summary table of storage volumes and runoff rates.
Common weakness: Not applying the climate change allowance to the storage calculations.
Section 7: Maintenance and Management Plan
What to include: A plan setting out who will maintain each component of the drainage system, how often, and what tasks are involved.
Evidence to attach: A maintenance schedule and, if applicable, a draft management agreement.
Common weakness: No named responsible party. Authorities need to know who will look after the system in the long term.
Section 8: Drawings
What to include: A set of drawings showing existing drainage, proposed drainage, and levels. Drawings should be clear and to scale.
Evidence to attach: Existing drainage plan, proposed drainage plan, and a levels plan.
Common weakness: Inconsistent levels between drawings. Check that proposed levels tie in with existing levels.
Section 9: Supporting Documents
What to include: Any other supporting documents, such as infiltration test results, flood risk assessment, or correspondence with the LLFA.
Evidence to attach: All relevant reports and letters.
Common weakness: Missing documents that were referenced in the text.
| Section | What It Proves | Common Weakness |
|---|---|---|
| Site and existing drainage | Baseline conditions | Missing sewer records |
| Hierarchy appraisal | Options were tested | No infiltration evidence |
| Proposed design | Water is managed | No levels or calculations |
| Maintenance plan | System keeps working | No named responsible party |
Our step-by-step drainage strategy guide for planning applications walks through each of these sections in order, so you can build the document without missing a required part.
Drainage Strategy Example: What a Complete Submission Looks Like
A complete drainage strategy example reads like a short report, not a set of drawings. It opens with a site plan and a paragraph on existing drainage, then states the discharge destination in one clear sentence. Next come the calculations: impermeable area, runoff rate, storage volume and the rainfall event used.
Common Validation Failures and LLFA Objections, and How to Fix Them
Most rejections are avoidable. The same handful of problems come up again and again:
- No infiltration testing. Fix: commission testing before submission, or evidence why it is not possible.
- Hierarchy not evidenced. Fix: one paragraph per option, with test results.
- Missing climate change allowance. Fix: state the allowance and apply it to storage calculations.
If you are already facing an objection, our guide on solving planning drainage objections sets out how to respond.
At The Drainage Designers, we handle site visits, flood risk assessments and SuDS design through to approval, with a transparent customer charter and a nationwide service. We work with homeowners, architects and developers.
Frequently Asked Questions
What is a drainage strategy for planning permission?
A drainage strategy is a document submitted with a planning application that explains how surface water and foul water will be managed on the site. It sets out the discharge destination, proposed drainage design, sustainable drainage systems (SuDS), and evidence that the drainage hierarchy has been followed. It also includes a maintenance plan and management responsibilities. The local planning authority and Lead Local Flood Authority (LLFA) use it to assess whether the development will increase flood risk elsewhere.
What should a drainage strategy include?
A complete drainage strategy should include a site location plan, topographical survey, existing and proposed drainage layouts, a flood risk assessment for planning permission, ground conditions and infiltration testing results, discharge destination with evidence of the drainage hierarchy, surface water runoff rates and volumes, attenuation storage capacity, climate change allowance, a maintenance plan, and management responsibilities. It should also explain how the design complies with local and national SuDS requirements.
How do you prepare a surface water drainage strategy?
Start by gathering site information, including a topographical survey and existing drainage records. Commission infiltration testing to establish ground conditions and permeability. Apply the drainage hierarchy to select the most sustainable discharge destination, using infiltration or a watercourse where possible. Design the surface water drainage network, including attenuation and SuDS features, and calculate runoff rates for the relevant rainfall events, including a climate change allowance. Finally, structure the document using a drainage strategy template and include a maintenance plan.
Do I need a drainage strategy for a planning application?
You typically need a drainage strategy for major development, sites in flood zones, or where the local planning authority or LLFA requests one. Even for minor development, such as a small extension, a drainage strategy may be required if the site is in a critical drainage area or if surface water runoff could affect flood risk. Check the validation requirements of your local planning authority before submitting, as requirements vary by area.